כיצד ניתן לפתור בעיות נפוצות בפנסים אחוריים?
אורים אחוריים הם קריטיים לבטחה בדרכים - הם מאפשרים לנהגים אחרים לראות את רכבך מהאחור, להזהיר על עצירות, ולהורות על פניות. כשיש בהם תקלה, אתה בסיכון לתאונת דרכים ואף עלול לקבל דו-ת. הידיעה הטובה היא שמרבית הבעיות באורות האחוריים קלות לפתרון עם כלים בסיסיים ומעט ידע. בואו נבחן איך לאבחן ולפתור בעיות נפוצות עם אורים אחוריים , שלב אחר שלב.
1. בדוק נורה שרופה
הסיבה הנפוצה ביותר לאי-פעולה של האורות האחוריים היא נורה שרופה. זוהי בעיה פשוטה לאבחנה ולתיקון.
- איך לזהות : אם אור אחורי אחד כבוי אך השני פועל, או אם האור לבלם פועל אך האור האחורי הרגיל לא, סביר מאוד שהסיבה היא נורה שרופה. לדוגמה, אם האור האחורי השמאלי כבוי אך הימני זוהר, הנורה השמאלית כנראה לא עובדת.
-
מה לעשות :
- כבה את הרכב ופתח את המנעול האחורי (או את הלוח הפנימי ברכב, ליד האור האחורי).
- הסר את מכסה האור האחורי - בדרך כלל יש להסיר מספר ברגילים או להוציא קליפים (בדוק את הדليل של הרכב שלך לשלבים המדויקים).
- משוך בעדינות את שקע הנורה. הנורה צריכה להיסובב או להימסר מהשקע.
- חפש פילמנט מקולף או שבור (החוט הדק שבתוך הנורה). אם הוא פגום, הנורה שרופה.
- החלף אותה בנורה חדשה מאותו סוג (בדוק את הנורה הישנה עבור מספר החלק, כמו 1157 או 7440). דחוף או סובב אותה למקום, ולאחר מכן בדוק את האור האחורי על ידי הדלקת אורות הרכב.
נורות שרוףות הן זולות (בדרך כלל 5–15 דולר) ולוקחות 10–15 דקות להחלפה. תמיד החלף את שתי נורות האור האחורי באותו זמן אם הן ישנות - זה מונע מהאחת להיכשל זמן קצר לאחר השנייה.
2. בדוק קפיץ פגום
אם שני האורות האחוריים מפסיקים לעבוד בו-זמנית, ייתכן שהבעיה היא במיתקן שבור. מיתקנים מגנים על המערכת החשמלית מפצעים, וזרם גבוה יכול לגרום להם "לפוצץ" (להתплавש), מה שמקטע את זרם החשמל לאורות האחוריים.
- איך לזהות : אם כל האורות האחוריים (כולל אורות בלימה ואורות כיוון) כבויים, או אם כשלו רק האורות האחוריים אך שאר האורות (כגון אורות הראיה) עובדים, בדקו את המפסק. הדليل של הרכב יראה היכן תיבת המפסקים ממוקמת (בדרך כלל מתחת לוחת הقيادة או ב comparador) ואת המפסק שפועלים על האורות האחוריים (מסומן כ"אורות אחוריים", "tail", או "stop/tail").
-
מה לעשות :
- מצאו את קופסת המיתקנים ופתחו את המכסה. השתמשו בתרשים שעל המכסה כדי לאתר את מיתקן האורות האחוריים.
- הוציאו את המיתקן בעזרת מושך מיתקנים (בדרך כלל מצויה בתוך הקופסה) או בעזרת פלiers דק.
- בדקו את המיתקן: מיתקן תקין מכיל פס מתכת שלם בפנים; מיתקן שרוף מכיל פס שבור או סימני שרפה.
- החליפו את המנחת שנשרפה במנחת חדשה עם אותו זרם (כתוב על המנחת, לדוגמה 10 אמפר או 15 אמפר). אסור להשתמש במנחת עם זרם גבוה יותר – זה עלול לפגוע בחיווט.
- בדקו את אורות הנסיעת לאחור. אם הם פועלים, סיימתם. אם המנחת החדשה נשרפת שוב, יש קצר (ראו שלב 4).
מנחות הן זולות (2–5 דולר) וקל להחליף אותן, ולכן זו בדיקה מהירה שכדאי לבצע כאשר כל אורות הנסיעת לאחור לא פועלים.

3. בדיקת מפסק האור של הבלם
אורות הבלם הם חלק מהמערכת של אורות הנסיעת לאחור, ובעיה נפוצה היא אורות בלם שלא נדלקים כשלוחצים על הדוושה. לרוב מדובר במפסק אור בלם פגום.
- איך לזהות אם אורות הנסיעת לאחור הרגילים פועלים, אך אורות הבלם לא (או שאחד מהם בלבד פועל), כנראה שהבעיה במפסק. המפסק ממוקם לרוב מתחת לדוושת הבלם – כשלוחצים על הדוושה, הוא מפעיל את המפסק, אשר שולח חשמל לאורות הבלם.
-
מה לעשות :
- מצאו את מפסק אור הבלם: זהו חלק קטן מפלסטיק או מתכת המותקן על זרוע דוושת הבלם.
- בדוק אם החיבורים רופפים: שלוף את הכבל החשמלי של המפסק, ואז חבר אותו מחדש בצורה אמיצה. לעיתים קרובות חיבור רופף גורם לבעיה.
- בדוק את המפסק: תשאל מישהו לעזור לך ללחוץ על דוושת הבלם בזמן שאתה בודק אם המפסק זז. אם הוא תקוע או לא זז, יש להחליפו.
- החלף את המפסק: קנה מפסק חדש (התאם לפי יצרן ודגם הרכב שלך, 10–30 דולר), שלוף את הישן, וثبت את החדש בעזרת סיבוכים או קליפים. בדוק את אורות הבלם – הם אמורים לפעול כעת כשתלחץ על הדוושה.
ה תיקון הזה לוקח 20–30 דקות ואין צורך בכלים מיוחדים, רק פטישון במקרה מסוים.
4. לחפש בעיות באלקטריקה
אם הנורות וה퓨וזים תקינים, ייתכן והבעיה נמצאת באלקטריקה. לאורך הזמן, החוטים יכולים להשתרשר, להתחמצן או להשתחרר, מה שמקטע את זרם החשמל לאורות האחוריים.
- איך לזהות : אור אדום נצנץ, אורות שפועלים מדי פעם, או אור אחד שפועלים לפעמים ולא תמיד מצביעים לרוב על בעיות באלקטריקה. לחות, מכרסמים, או בלאי כתוצאה מהגבה והורדה של הדלת האחורית יכולים לפגוע בחוטים.
-
מה לעשות :
- בדוק את האריזה החשמלית: עקוב אחר החוטים מהיחידה האחורית אל האריזה הראשית של הרכב. צפה בבליטות במכסה, חוטים חשופים, או קורוזיה (צמיחה ירוקה/לבנה).
- בדוק את החיבורים: היחידה האחורית מחוברת לאריזה באמצעות מין פלט כ plastic. פזר את החיבור, בדוק אם יש אבק או קורוזיה, ונקה אותו באמצעות בד יבש או נוזל לניקוי מגע חשמלי.
- תקן חוטים רופפים או שבורים: אם חוט רופף, חבר אותו מחדש. אם הוא בלוי, פשט מעט מהעטיפה (רבע אינץ'), סובב את הקצוות החשופים יחד, וכסותם בטפס חשמלי או מין חיבור חוטים. עבור חוטים עם קורוזיה, גזור את החלק הרע וחבר את הקצוות הטובים יחד.
- בדוק את האורות האחוריים: לאחר תיקוד האריזה, הדלק את האורות ובדוק אם הם פועלים.
אם נזקי האריזה חמורים (למשל, נגנבים על ידי מכרסמים), ייתכן שתצטרך להחליף את כל האריזה החשמלית, אך מצב כזה נדיר. ברוב המקרים אפשר לאתר ולתקן בקלות את הבעיות.
5. בדוק אם יש יחידת אור אחורית פגומה
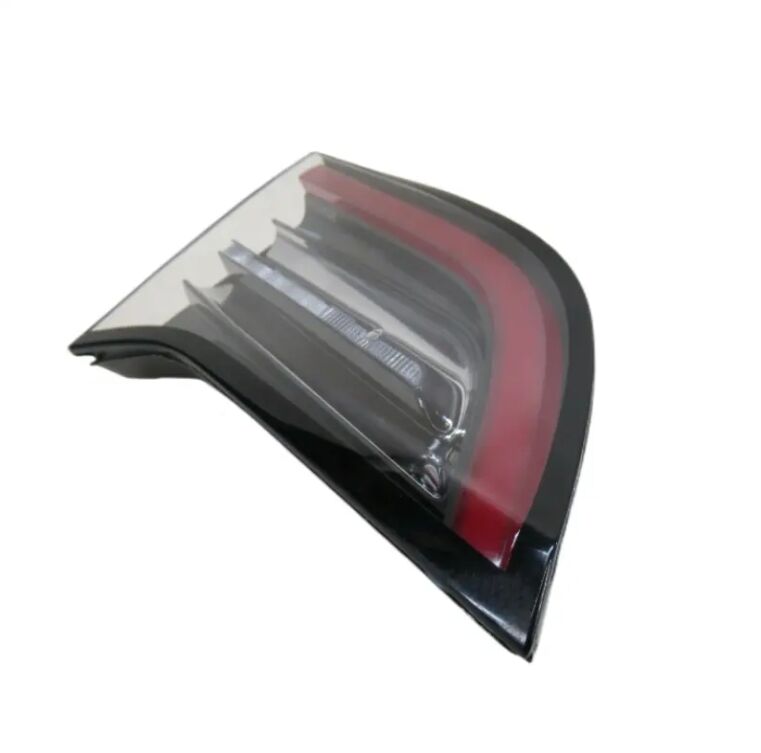
ברוב מכוניות חדשות, אורות האיתור הם חלק מאספה בודדת (קליפה פלסטית עם נורות או לוחות LED). אם האספה נשברת או נפגעת, זה עלול לגרום לשבירת האורות.
- איך לזהות אם עדשת אורות האיתור נשברה, לחות עשויה לחדור פנימה ולקבל נזק לנורות או לחוטים. באספות LED עלול להיות שלטת מעגל שרופה, מה שגורם לכל האור להפסיק לעבוד.
-
מה לעשות :
- הסר את אספת אורות האיתור (היא מוחזקת במקומה בעזרת ברגים או קליפים, כמו בהחלפת נורה).
- בדוק cracks, לחות או נזק: אם יש מים בפנים, יש לנקז אותם ולסגור סדקים קטנים בעזרת סיליקון. בסדקים גדולים – החלף את האספה.
- בדוק את אספות ה-LED: אם ה-LED לא עובד, ייתכן ששלטת המעגל פגומה. החלף את האספה כולה (המחיר נע בין 50–200 דולר) מאחר שקשה לתקן שלטת LED.
זו פתרון מוקדם אחרון, אך האספות נועדו להחלפה קלה, עם הוראות במדריך המשתמש של המכונית שלך.
שאלות נפוצות
למה אורות האיתור שלי עובדים אך אורות הבלם לא?
זה בדרך כלל מתג אור בלם לא טוב (מתחת לרגל הבלם) או חוט שבור לאורות הבלם. בדוק את המתג קודם, זו הסיבה הנפוצה ביותר.
אני יכול לנהוג עם פנס אחורי שבור?
לא, זה לא בטוח ולא חוקי ברוב המקומות. נהגים אחרים לא יכולים לראות אותך עוצר או פונה, הגדלת הסיכון לתאונה. תפתור את זה בהקדם האפשרי.
כמה פעמים אני צריך לבדוק את האורות האחוריים שלי?
בדוק אותם כל חודש: הדליק את האורות, תצטרך מישהו לעמוד מאחורי המכונית, ובדיקת בלמים, סימנים פנייה, וציאורים אחוריים רגילים. זה לוקח שתי דקות ומונע בעיות.
למה האורות האחוריים שלי נשרפים כל הזמן?
חום יתר ממנורה רופפת (רטט פוגע בחומר הנסיך) או פתח לא טוב (קרוד או רופף) הוא לעתים קרובות הסיבה. לנקות את הפתיחה עם נייר גבישה ולוודא כי הנורות הם הדוקים.
האם נורות LED מאחור קשות יותר לפתור בעיות?
הם דומים. בדוק קודם את הבטוחים והכבלים. אם נעלמות מנורות LED, המערכת כולה בדרך כלל צריכה להחלפה, אך הן מחזיקות יותר זמן מאשר נורות מסורתיות (50,000+ שעות לעומת 1,000 שעות).

